My focus right now is to get a Nurgle army ready (again). Even though it should be painted I am currently more eager to get the troops ready for the table so I can play with them. The building will take time as I basically going to convert every miniature in the core army, which is based on Codex CSM. So before I start the painting, I will do a lot of building.
Something I was playing around in my mind is to build a “proper” Nurgle
Heldrake. The dragon works for the Alpha Legion (just add two more heads), Iron Warriors or maybe even a Khorne army… but not for a Nurgle force (at least from my point of view).
I am a big fan of the
Forge World Blight Drone, but unfortunately it is too small to be used as a
Heldrake. So, why not let it grow into a… Blight Drake? That’s basically what I am trying right now.
The foundation of the model is a
Blight Drone with a
Tervigon’s spawning sack in the middle. I got the Blight Drone cheap on ebay… and it turned out to be a recast, which sucks. The quality of the cast is bad and the resin is brittle as hell, so all the details like the cables broke of by just looking at them. Not good at all. At the same time, I will have to do a lot of sculpting work anyway, so I will “just” spend some more time on fixing the crappy recast issues. One thing I learned already for the future: I will only order direct from Forgeworld again, even though I might hack and cut the miniature to bits and pieces for a conversion.


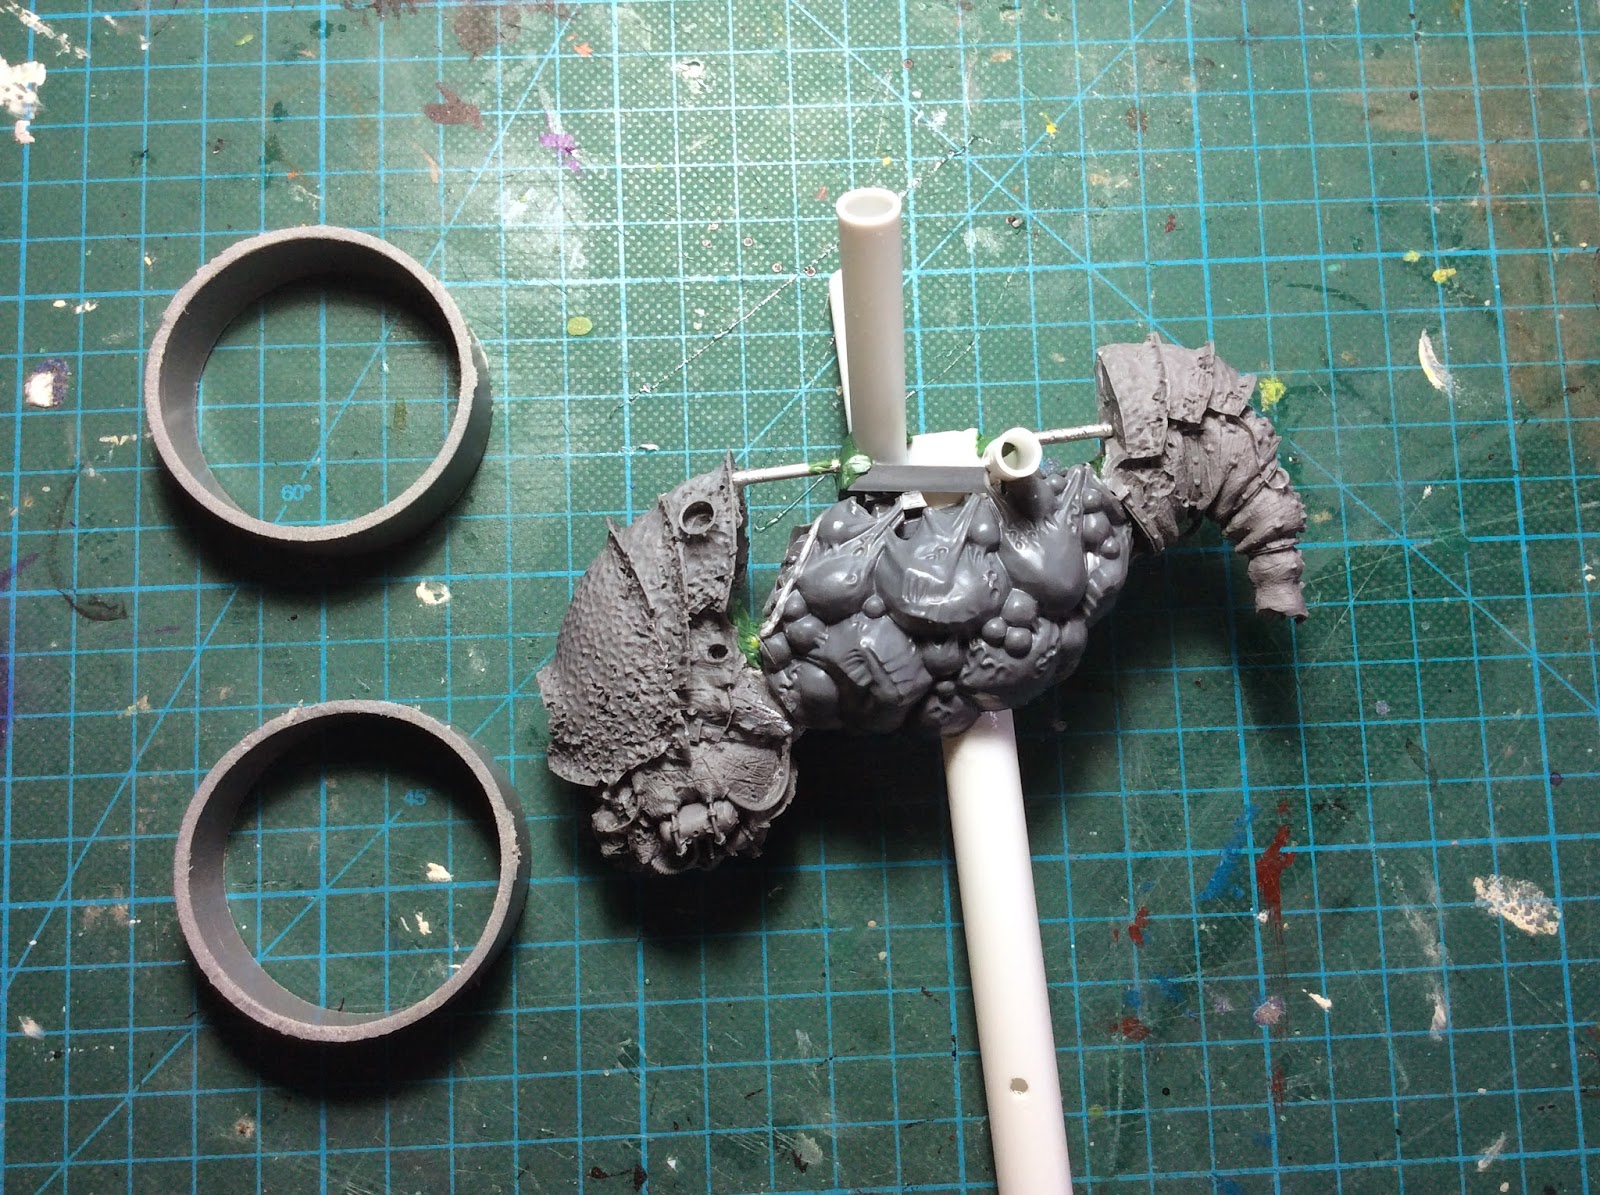
First step was to build the frame. After gluing the head- and tailpieces to the spawning sack – they were fixed with aluminum rod – I glued sprue pieces as some kind of artificial bones into belly to stabilize it. I also (something I forgot when I built the Daemon Prince) also inserted a piece of plastic rot for the custom flight stand in the middle of the daemon engine. While going crazy with the plastic rod I also added connection struts for the rotor arms and the exhaust pipes.
To get the base shape I crammed aluminum foil into the body, pressed and squeezed it around until I was happy and covered it up with green stuff – I trick I learned from good friend of mine (thanks Flo!).
After the base shape was established I started with the work on the belly. First I added some metal straps because the Blight Drone has those as well; they are basically holding the whole wobbly body together and I want this to be reflected on the whole model. To make sure they look consistent I removed all the resin studs from the Blight Drone pieces and replaced them with the “water-filter”-ones I used for the big straps on the neck and the belly. After adding some machine parts – I used bits and pieces from the
Thanquol & Boneripper and the
Stormfiends kits (I have more plans with those guys for the Nurgle force) – I started with the sculpting of the skin.
As with the
Daemon Prince I want the look of the skin to be consistent. So I either sand of all the details of the skin of the Blight Drone or I re-sculpt the belly in a way that it looks the same. I go with the latter option. It is more work (and I have no idea if I can pull it off), but it also looks more disgusting.

While glue/green stuff was drying I worked on the rotors. As the whole body is bigger, those need to be bigger as well. At first I was a bit puzzled how to re-build them, but after a visit in the hobby- and the do-it-yourself stores I got plenty of plastic tubes, a drainpipe and a rough idea. Getting the base construction wasn’t too complicated, even though the sawing of the big grey drainpipe drove me crazy: I just wasn’t able to get two similar and (that was the hardest part) straight pieces. Around 7 attempts (including a lot of swearing, the usage of different saws and the building of a weird Skaven-style construction to keep everything in place) later I had two pieces that were good enough…they weren’t perfect, but they will be covered in green stuff anyway.

Building the inner construction with the plastic tubes was a lot of fun and I begin to understand why (especially Ork) players love to build custom vehicles. For cutting the rotors out of the rather thick plastic boards (2,5mm) I bought a special compass (with a knife instead of a needle/pencil lead). I took some time and some additional sanding, but without this tool I wouldn’t have been able to get the rotors the way I wanted them.
That’s it for now. I will continue sculpting the belly and, while waiting for the green stuff to get hard, drill more corrosion holes in the rotors.